This article was originally published on 18 April 2015.
How to copy and get a print from old glass plates and negatives
Author: Dr Michael Pritchard FRPS
One of the regular enquiries that The Society receives is: “How can I get a photograph from an old glass plate”. These are usually negatives, but sometimes positives, such as magic lantern slides. If you have a friend with a darkroom then it’s simplest to have him or her make a contact print or an enlargement from a negative. Scanning using a flatbed copier has the potential to damage fragile originals and re-photographing can be a better option. Digital photography makes this very simple.
Caution
Before you start make sure that the original plate (or film sheet or roll film) is in good condition. If the emulsion is crackled or peeling then particular care will be needed so as not to further damage the emulsion which holds the image. Where the original is in poor condition or if you have film which is sticky or brittle then seek the advice of a specialist conservator.
Equipment needed:
A soft brush, light box, two L-shaped black cards, a digital camera, tripod; image editing software.
Preparation
Assuming the original plate is in good condition, the use a soft brush to remove any dust or dirt. Although plates and films can be washed in distilled water and cleaned this is best left to a conservator in case you cause damage to the emulsion. Any dirt on the glass side can be cleaned but take care to ensure that any water does not touch the emulsion and make sure that no smears or drying marks are left behind. Do not attempt to clean the emulsion side. Any silvering to the emulsion is best left to a conservator.
Method
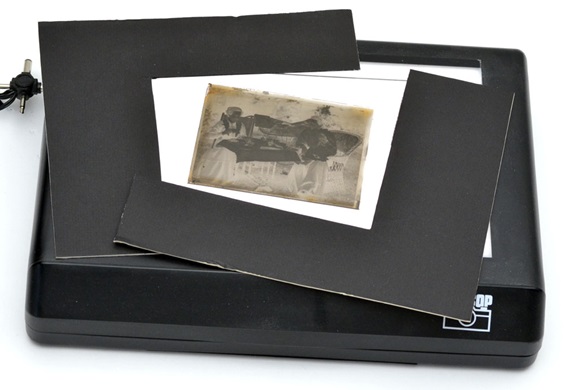
1. Place the plate on the light box and use the two L shaped cards to mask off any extraneous light. LED light boxes are perfect and can be obtained from photographic retailers or from eBay.
2. Mount your camera on a tripod and point it downward over the plate. Ensure that it is square over the plate. The plate should look square in the camera viewfinder with no distortion.
3. Turn off any room lights so that the only light is from the lightbox. This will minimise reflections. If you are photographing a highly reflective surface then you might need to use black card or black material around the camera lens to stop reflections from the camera or above the light box.
4. Use the camera’s auto-exposure to determine the exposure; or set it manually and check the camera screen to review the result.
5. Once the exposure has been made you can use image editing software such as Photoshop, Lightroom, Elements, etc., to reverse a negative to a positive, and to make any adjustments to contrast, density or colour balance (or convert to grey scale) as required,
The finished file can be viewed on screen, used in PowerPoint or printed.
This technique works well for negatives, colour plates, lantern slides and cut film sheets. For lengths of rollfilm or 35mm film you may need to build a holder to ensure that the film stays flat.
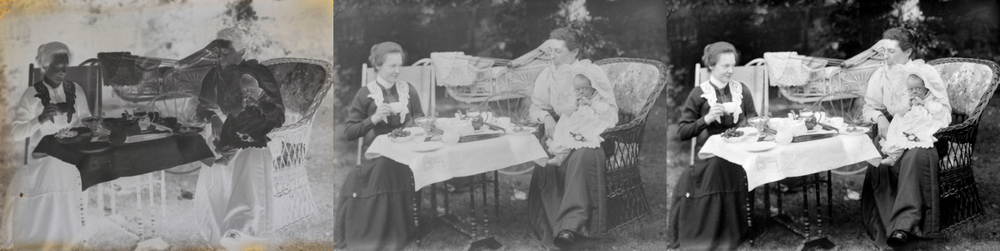
Above middle: File converted to grey scale and reversed from negative to a positive
Above right: Adjustments to the contrast and levels to produce an image for printing
Top Tips
1. As a guide use an aperture of f/5.6 to ensure that any film, that may not be laying completely flat, is all in focus; your tripod will ensure that the camera remains still even if a slow speed is used – although use a remote release or self-timer to ensure you don’t jog the camera when if you press the shutter release button.
2. Ensure you focus on the emulsion and not the top side of the glass plate – double check this in case the camera autofocus, if you’re using it, tries to focus on the glass.
3. If your camera has a zoom lens then keep your camera high and zoom in to the fill the frame. The longer focal length will keep any distortion to a minimum.
4. Shoot in colour and use your software to convert black and white plates to greyscale. This will remove any colour cast from your lighting.
5. Ensure that the emulsion side of any negatives is face down i.e. is facing away from the camera lens. This will ensure your image will be the right way round.
6. If you have a lot of 35mm slides to copy you are best advised to buy a proper slide copier which will be faster and more accurate than this method.
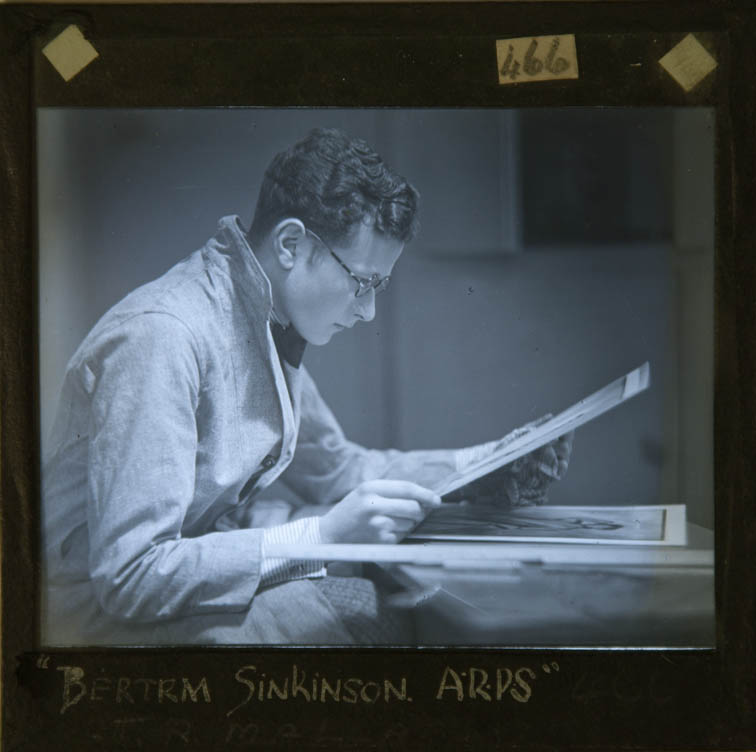
7. If you are copying a lantern slide you might wish to retain any caption on the slide’s mount or binding paper. You can adjust your exposures so you are correctly exposing for the light from the light box and for your room’s ambient light - See lantern slide copy, above right.
If you have any questions or queries contact Dr Michael Pritchard FRPS at The Royal Photographic Society by emailing: michael@rps.org